
AI has dramatically lowered the barrier to filmmaking.
You don’t need a camera.
You don’t need actors.
You don’t need a production crew.
What you do need is a way to navigate a fast-moving ecosystem of tools that all work differently, expect different inputs, and solve different problems. For most beginners, that complexity becomes the real blocker. They get overwhelmed long before they ever finish a first project.
This post walks through a practical, repeatable beginner workflow for AI filmmaking — the same one we use internally at WunderNode. The goal isn’t to chase every new model or feature. It’s to give you a structure that lets you start, finish, and iterate without burning weeks on trial and error.
The Two Mistakes Most Beginners Make
Almost everyone new to AI filmmaking falls into the same traps:
- Trying to use a single tool for everything
- Prompting without structure or visual intent
No single model excels at every part of the filmmaking process. Some are better at realism, others at stylized motion. Some are fast but limited, others slower but far more flexible. Some support start-and-end frames, others don’t. Some handle characters well, others shine at environments.
Tool choice directly affects your results. Treating AI like a single magic box usually leads to frustration.
Why Tool Choice Matters — and How We Handle It
In an ideal setup, you want access to multiple models so you can use the right one at the right moment:
- One model for high-quality stills
- Another for controlled camera motion
- Another for character consistency
- Another for fast iteration
The problem is that managing multiple subscriptions, interfaces, and file exports quickly becomes painful.
That’s why we built WunderNode.
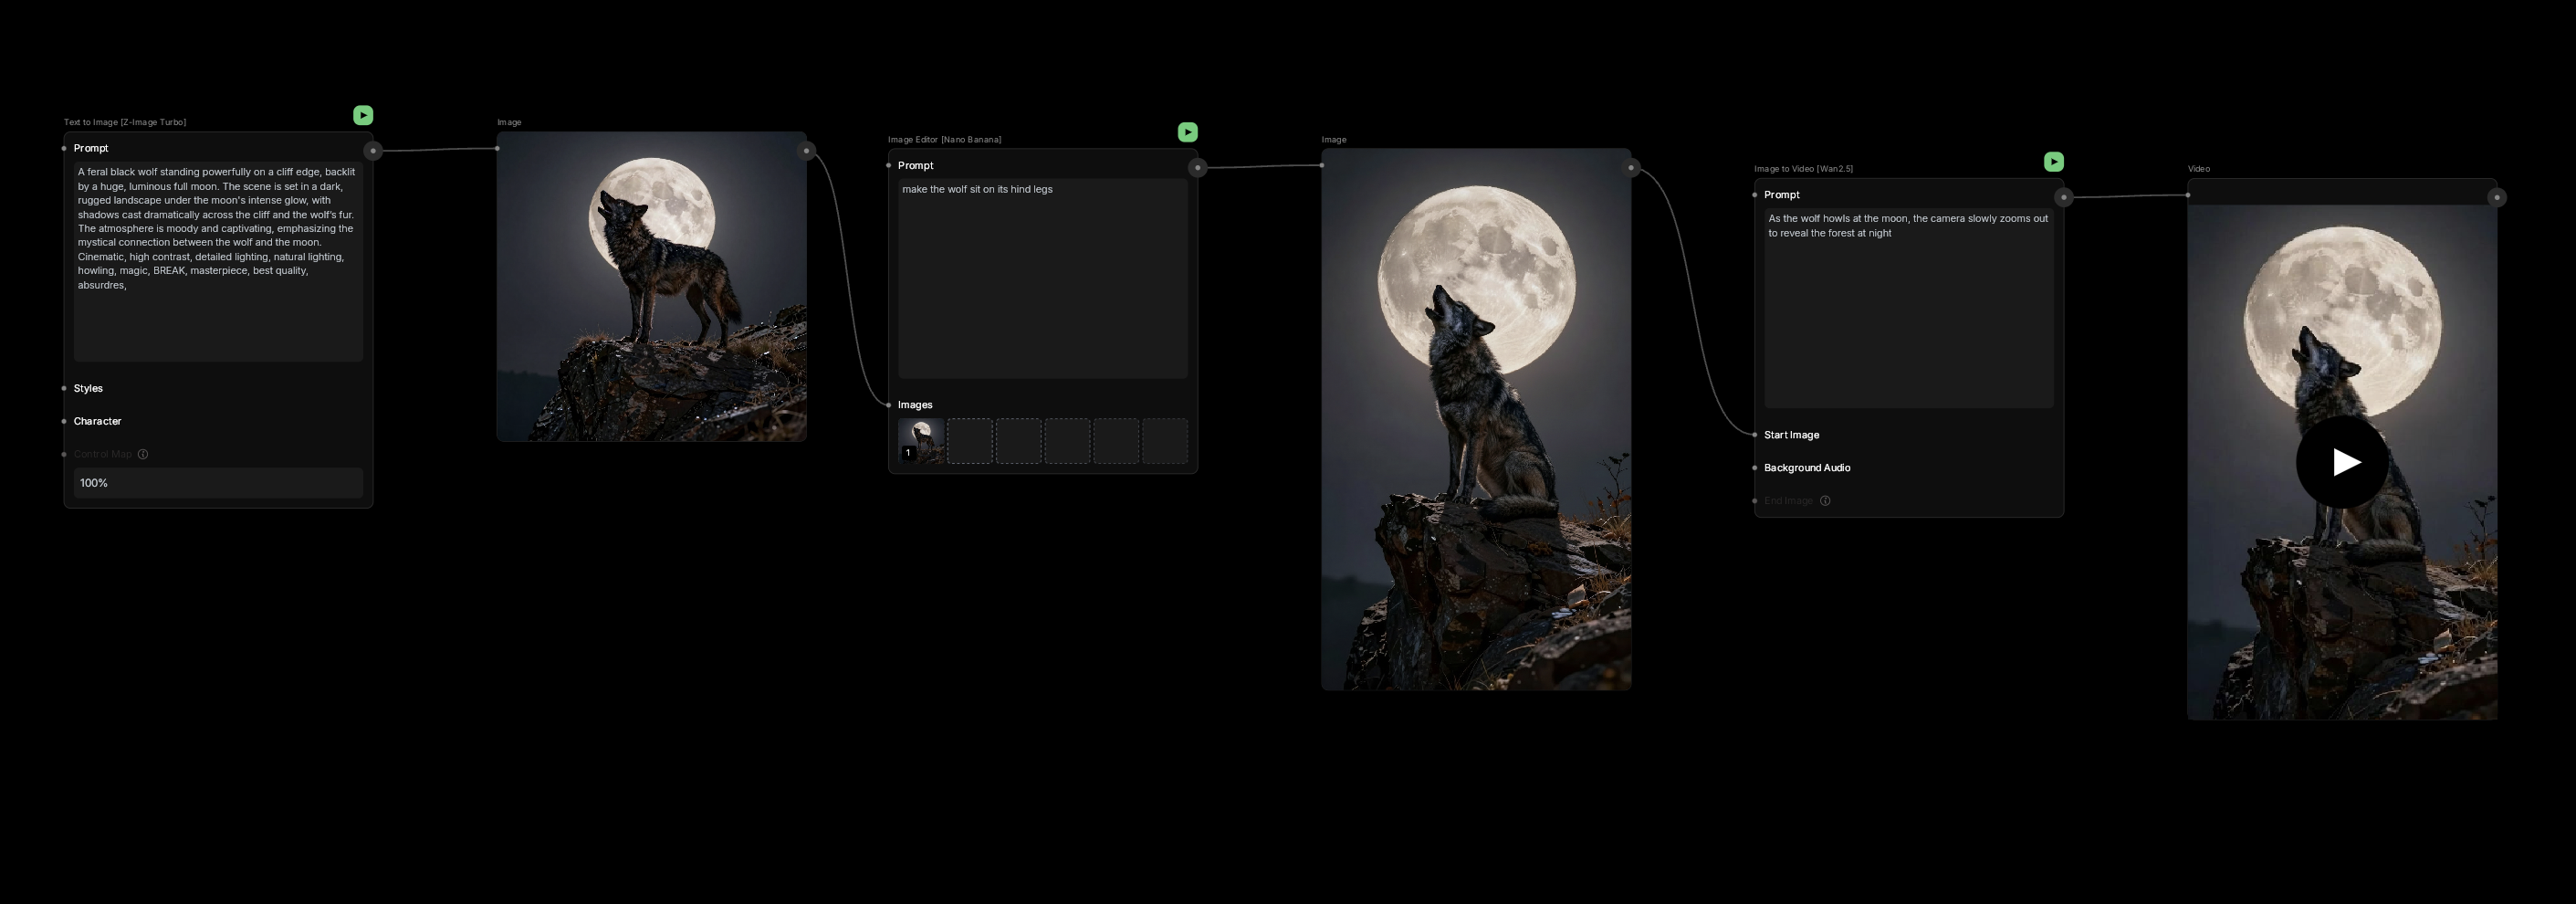
WunderNode lets you build an end-to-end AI filmmaking workflow in one place — visually, step by step — without constantly jumping between tools.
A Unified Workflow Inside WunderNode
Inside WunderNode, your entire pipeline lives in a single canvas:
- Text-to-image
- Image editing
- Image-to-video
- Asset management
Each step connects to the next as a node. Instead of fighting tools and formats, you focus on the story you want to tell.
Step 1: Start With the Story
Every film starts with a story.
Before opening any image or video model, we start with ChatGPT to shape the narrative. The key is to be explicit. We always specify:
- Genre
- Tone
- Target length
- Output format
- Constraints (for example: no dialogue, first-person POV, one main character, a plot twist)
These constraints act as guardrails. They give the model clarity, and they give you something concrete to react to.
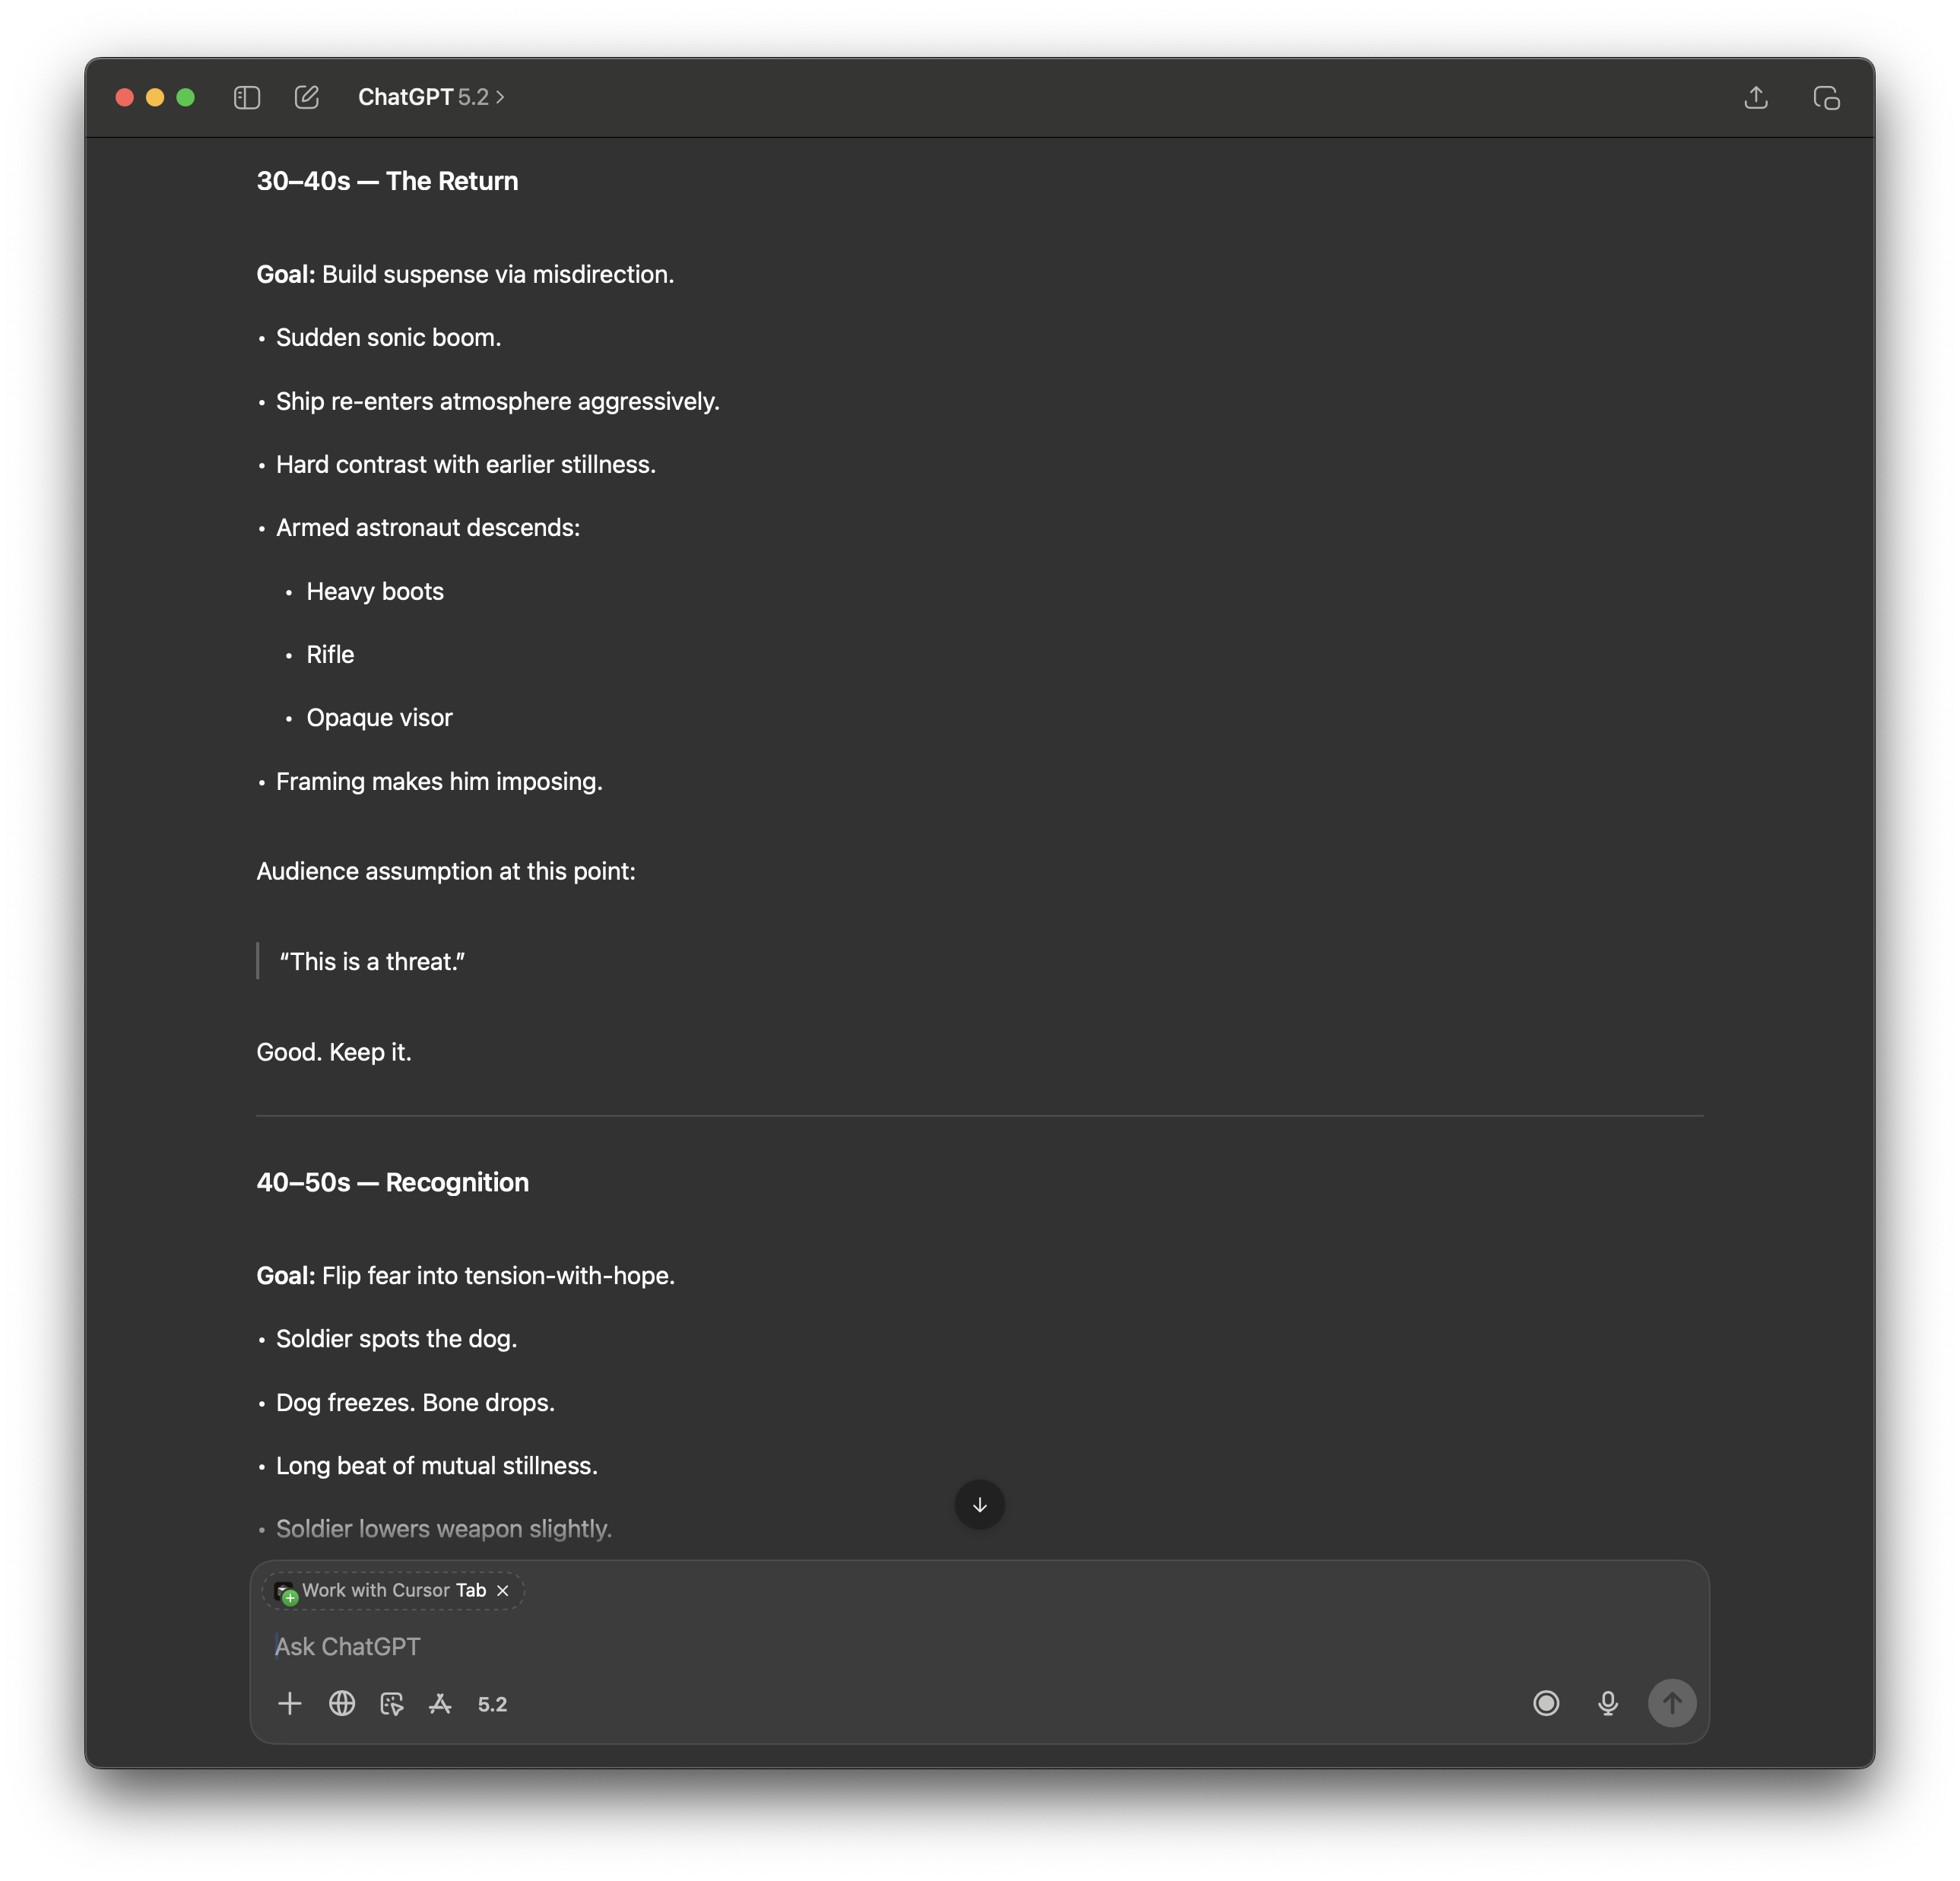
We iterate back and forth until the story feels right. Then we ask ChatGPT to break it down into:
- Visual beats
- A shot list
This turns an abstract idea into something you can actually build.
Step 2: Turn Shots Into Image Prompts
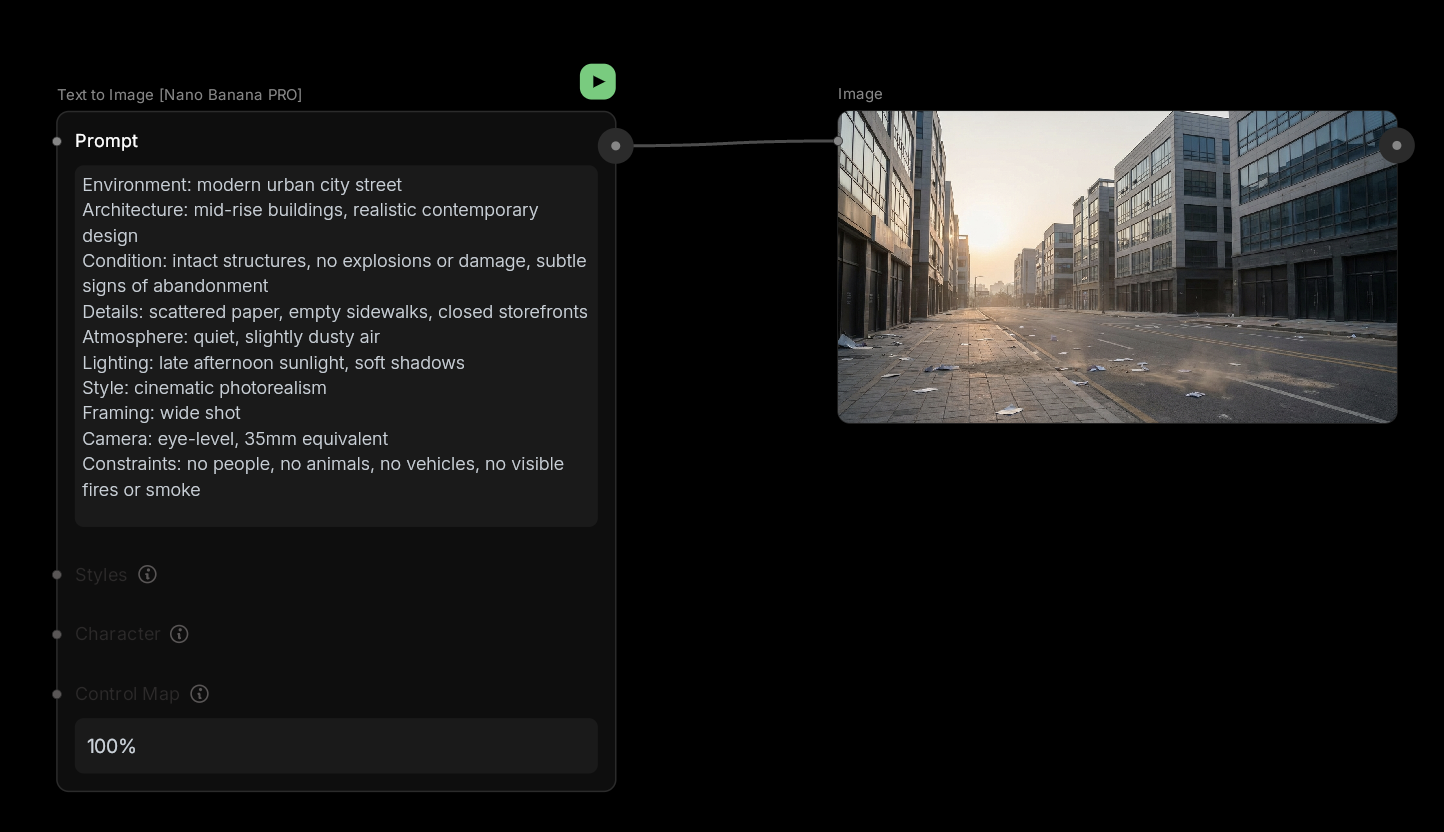
Next, we ask ChatGPT to write detailed image prompts for the opening shot of each scene. These prompts are tailored to the image generator we plan to use.
In this workflow, we use Nano Banana for image generation.
We also ask for:
- Base images for each character
- Base images for key environments
These base images act as visual anchors. They define the look of the film and help maintain consistency across scenes.
Step 3: Generate Core Assets in WunderNode
Now we move fully into WunderNode.
We use text-to-image nodes to generate:
- Characters
- Environments
- Key story moments
For cinematic output, we set the aspect ratio to 16:9.
For social content, we’d use 9:16 instead.
To move quickly, we duplicate nodes rather than rebuilding them. In WunderNode, you can duplicate a node by selecting it and pressing Cmd-D.
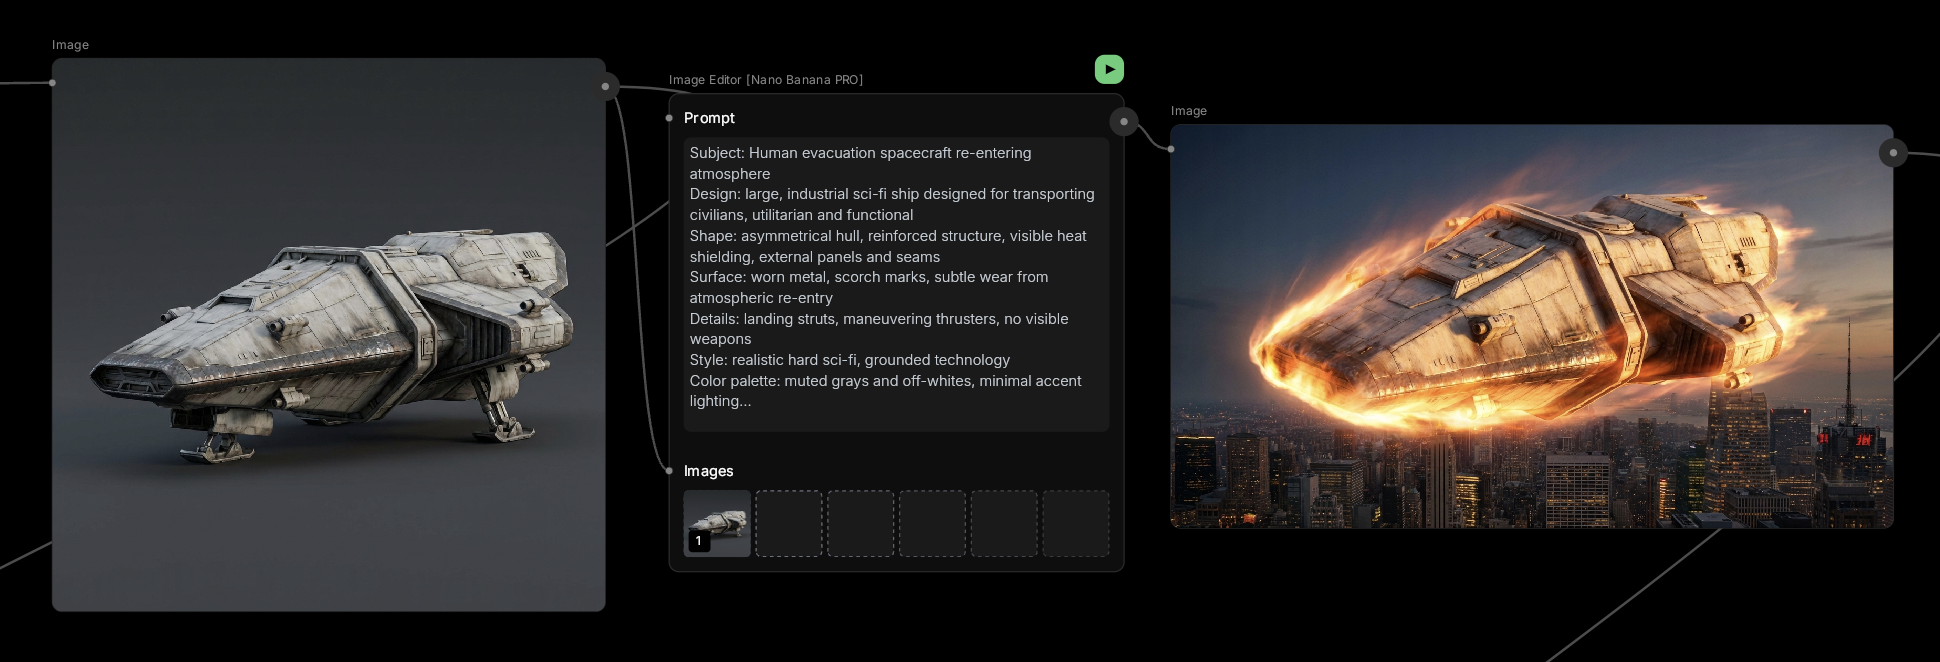
Step 4: Refine Instead of Regenerating
Sometimes ChatGPT’s prompts work perfectly. Other times, they need small adjustments.
And occasionally, you’ll get an image that’s almost right — but not quite.
Instead of regenerating from scratch, we use the Image Editor node to make targeted changes. This saves time and helps preserve visual consistency.
Character Consistency Without Training
Older AI workflows often required generating dozens of images and training custom models just to keep a character consistent.
With the latest models inside WunderNode, that’s usually unnecessary.
A single strong base image per character is often enough to maintain consistency across scenes. This alone can save hours of work.
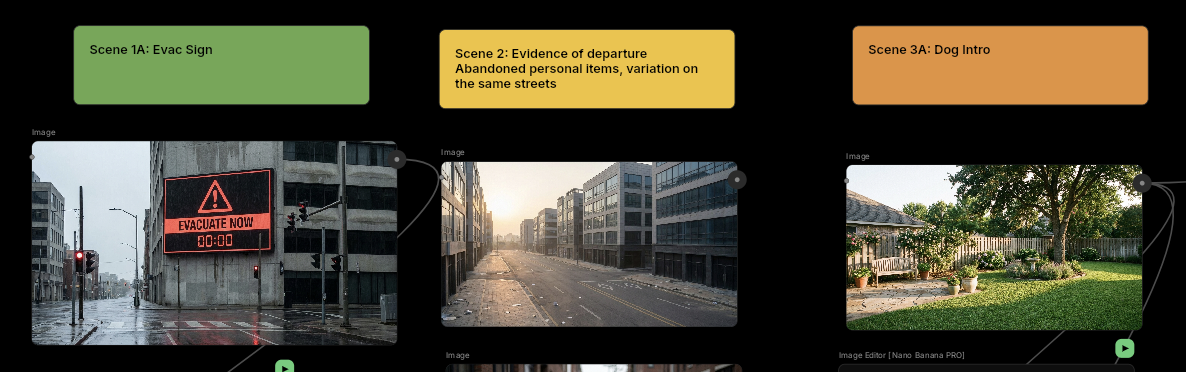
Step 5: Build the Storyboard
Once the core assets are ready, we build a storyboard directly inside WunderNode.
We:
- Reuse existing images
- Generate new ones only when needed
- Carry character images across scenes to maintain continuity
This becomes the visual blueprint for the film.
Step 6: Animate With Image-to-Video
For the final stage, we animate images using image-to-video nodes.

Some shots only need a single starting frame. Others — especially controlled camera moves — benefit from both a start frame and an end frame.
For example, in a tilt-up shot:
- A frame starting at the character’s feet doesn’t tell the model what the rest of the character looks like
- The result is often unpredictable
In these cases, we:
- Use an Image Editor node to generate both start and end frames
- Animate the clip using a model that supports both frames, such as Veo 3.1 or Kling 2.5
This gives far more control over camera movement and composition.
Step 7: Export and Edit
Once the clips are ready, we bookmark the ones we like.
WunderNode lets you download everything at once as a single ZIP file from the asset library.
From there, we move into a traditional video editor. We use DaVinci Resolve, but CapCut, Premiere Pro, or any editor works.
This is where we:
- Arrange clips
- Adjust timing
- Add transitions
- Lock the final structure
What About Audio?
We didn’t cover audio here.
Dialogue, lip sync, sound design, and music are deeper topics that deserve their own breakdown. We’ll cover those — along with more advanced camera movement techniques — in a future post.
Why This Workflow Works
AI often feels overwhelming because most tools aren’t designed around how creators actually work.
A structured workflow changes that. When each step feeds cleanly into the next, AI becomes predictable, repeatable, and scalable.
That’s the philosophy behind WunderNode — and it’s the same workflow we use to build everything you’ve seen here.
If you want to follow this process end-to-end, using all the right tools in one place, WunderNode is built for exactly that.
Once you have a clip you like, the next problem is making six of them look like the same film. That takes a different set of habits, and they are all in How to Make an AI Short Film.
One finished project beats ten abandoned experiments.